Including National Park Research Reports in Your Curriculum
We often find ourselves juggling an array of standards. It can be overwhelming. However, once I started looking at the standards like tools in a toolkit, I saw I could accomplish multiple goals at once. In my Social Studies classroom, I’m all about blending Social Studies standards with reading and writing whenever possible. One of my go-to projects that perfectly aligns with this approach is the National Park Research Reports. Not only do they fit seamlessly into my curriculum, but they also expose my students to the research process and letter writing. Skills that are sometimes overlooked in our tech-driven world. So, join me as I share how I teach the research process and explore this resource!

Why Research Reports and Letter Writing Are Important
I want to take a minute to share why researching and letter writing are invaluable skills for our middle schoolers to master. Time is precious inside the classroom so we want to make sure we are giving time to the right skills. These skills can be taken with them when they leave our classrooms and continue in their academic and professional paths!

Research isn’t just about regurgitating facts. It’s about learning how to navigate the vast sea of information that’s available to us. In today’s digital age, being able to sift through sources, evaluate their credibility, and explain information is more crucial than ever. By engaging in research projects like the National Park Research Reports, our students use their critical thinking skills but also learn how to conduct themselves as informed citizens in our information-saturated world.
In an era dominated by emails and texts, crafting a well-written letter can sometimes feel like a lost art. However, it’s a skill worth preserving. Letter writing fosters clear communication. Our students learn how to articulate their thoughts effectively. They’re able to start growing a sense of professionalism and courtesy. Plus, there’s something undeniably special about receiving a handwritten letter in the mail. It’s a personal touch that digital communication simply can’t replicate.
Overview of National Parks Research Reports
This project embodies cross-curricular teaching at its best! My students’ mission was to craft an informational 5-paragraph paper, complete with an introduction that grabs their readers’ attention. Then, they had to write three detailed body paragraphs and a conclusion that tied everything together.
We tossed in some suggested topics for those body paragraphs. Some possible topics students could include were the park’s landforms, history, activities, programs offered by the park, and facts about the fascinating flora and fauna that call the park home.
Students got to pick the three topics that spoke to them the most. They wanted to choose the three that fit best with their chosen park and the research they had on hand.
Now, I should mention, we went old school with this one – paper format all the way. No speeches for us this time around because we saved those for our next project, which was exploring countries around the world. I did ask for a picture or a visual aid to enhance those papers and provide a visual component to the research reports.
Teaching How to Write Research Reports
Before diving straight in, it’s important to remember this: Our kiddos do not write at this level every day for every assignment. For many of your students, this may be their first or second time writing in this format and with this type of information. It’s important to be patient with each step because it will take a while to produce the end product.
When I taught 6th grade, we would take the entire quarter to complete our research reports on the different National Parks. The time dedicated to it is so worth it! Breaking down each step of the process and teaching them how to do it in addition to actually doing it really helps them build a strong foundation in research skills.
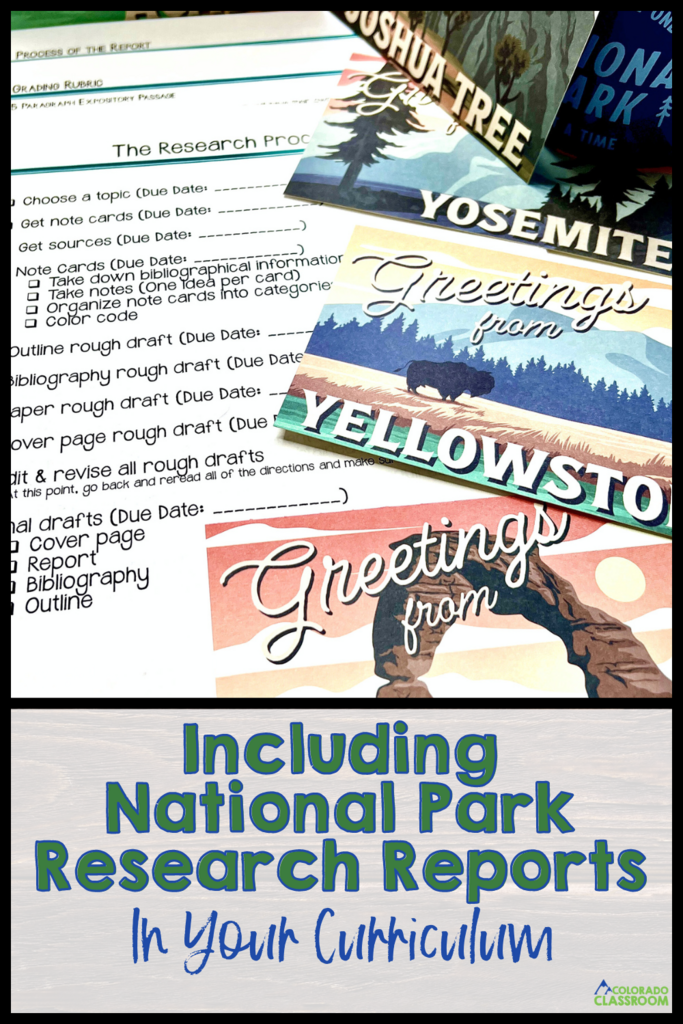
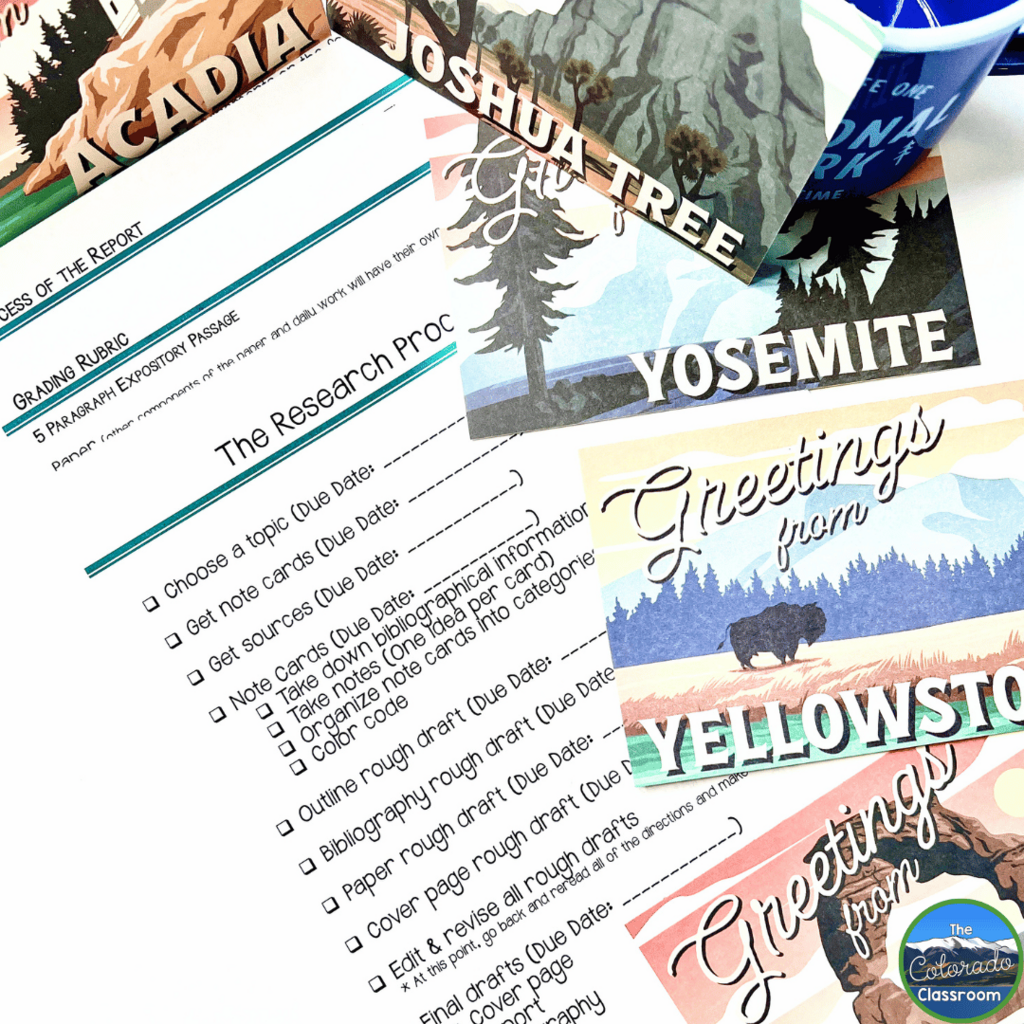
These are the steps we followed for this research report project. As you read through them, just remember these steps were spread out to cover one nine-week grading period.
Step 1: Choose a National Park
To start this project, each of my students selected one of the 62 National Parks available in the resource to focus on while researching. They were expected to become experts in their chosen park, so we made sure it was one they were interested in.
To get them excited, show a slideshow of pictures or a quick video about different parks. If they get stuck, ask a few questions about what type of park they are looking for. This can be helpful to help them narrow down the options. We might narrow the choices down according to a park that lines up with their personal interests (i.e. volcanoes, rare plants, type of wildlife), an ecosystem they like (i.e. desert, mountains, grasslands), or somewhere they would like to or have visited.
Once the park was selected and approved, I started to give them the tools they would need to be successful while researching, beginning with writing a letter to their chosen park.
Step 2: Letter Writing to National Park
We knocked out two tasks at once by tackling letter writing about a month before diving into our National Park Research Reports. I had students write letters to the National Park of their choice. In their letters, they requested pamphlets, maps, and other goodies to learn more about the national park that would be the focus of their research project.
Most parks responded within 4-6 weeks, providing students with plenty of resources to fuel their research. Although they still had to hit the books (either our library or the public one) to find additional information, they were well-equipped to dive into their exploration of these natural wonders.
Step 3: Using Index Cards While Researching
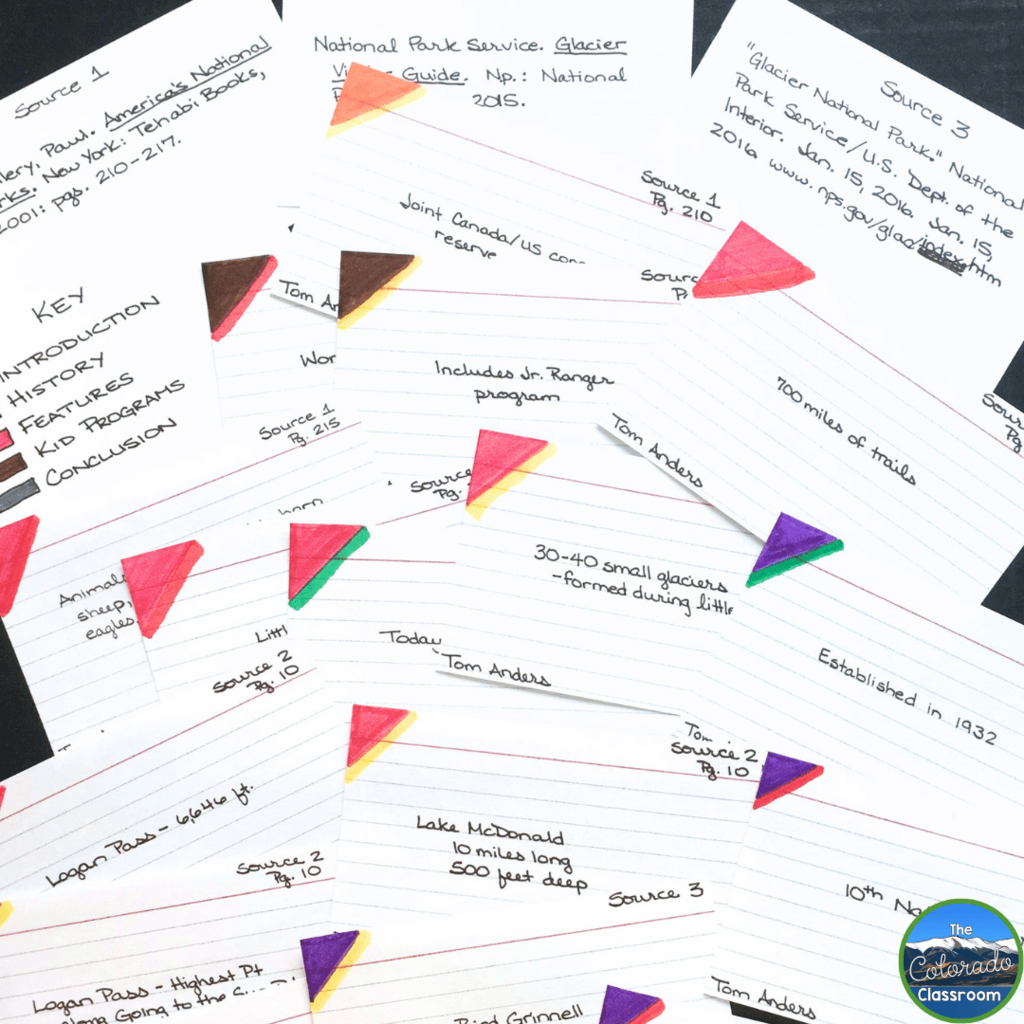
At the beginning of the research step, students received a stack of index cards. These cards became their best friends as they explored books, websites, and other resources for information about their chosen parks. But we didn’t expect them to know what to do with the cards. We provided explicit instructions on how to use index cards for taking notes. With note cards in hand and an understanding of what to do, they could jot down key facts, quotes, and sources, organizing their findings in a manageable and systematic way.
Having a random stack of index cards can lead to being confused or not knowing where to go from there. So, I always taught my students how to color-code their index cards. We would each take one of our blank index cards to create the key to remember what each color represented. The introduction and conclusion paragraphs are represented by coloring the top left corner of the card green. Facts about the history of the park will be purple, features of the park will be orange, and for the third section of choice, students can use brown.
Once the cards are color-coded for the different paragraphs and we have our research, we begin organizing them even more. Anything highlighted yellow is considered to be a main detail or main fact. Details highlighted in red further explain the yellow sentence above it. These can be explanations, examples, evidence, events, or experiences. Include another yellow detail with more red details to support it, and you got yourself a paragraph. If there is enough, a third set would be fine as well. End the paragraph with a green conclusion. Repeat the process for the remaining paragraphs!
By teaching our students each of these steps, we not only helped them find success in this project, but we also taught them research and organizational methods they could use for years to come.
Step 4: Citing Sources with Bibliographies

Next on the agenda are bibliographies. I wanted to hit on this one in the beginning with my students so they understood the importance of giving credit where credit was due. Also, who wants to put hours into researching only to be told at the end they’d have to backtrack to find all their sources again to cite them? Talk about a major feeling of defeat! By creating their bibliographies as they went, students learned how to acknowledge the sources that informed their research by respecting others’ work.
I would walk them through how to make a bibliography, step-by-step, and then post a mastery copy in our room as a model. I would explain to title the page “Bibliography” and center it at the top of the page. Then, all sources should be alphabetized by the author’s last name. We looked at when we would capitalize letters, underline, and add punctuation. I even reviewed with them how to double-space their text and indent.
Step 5: Outlining our Research Reports
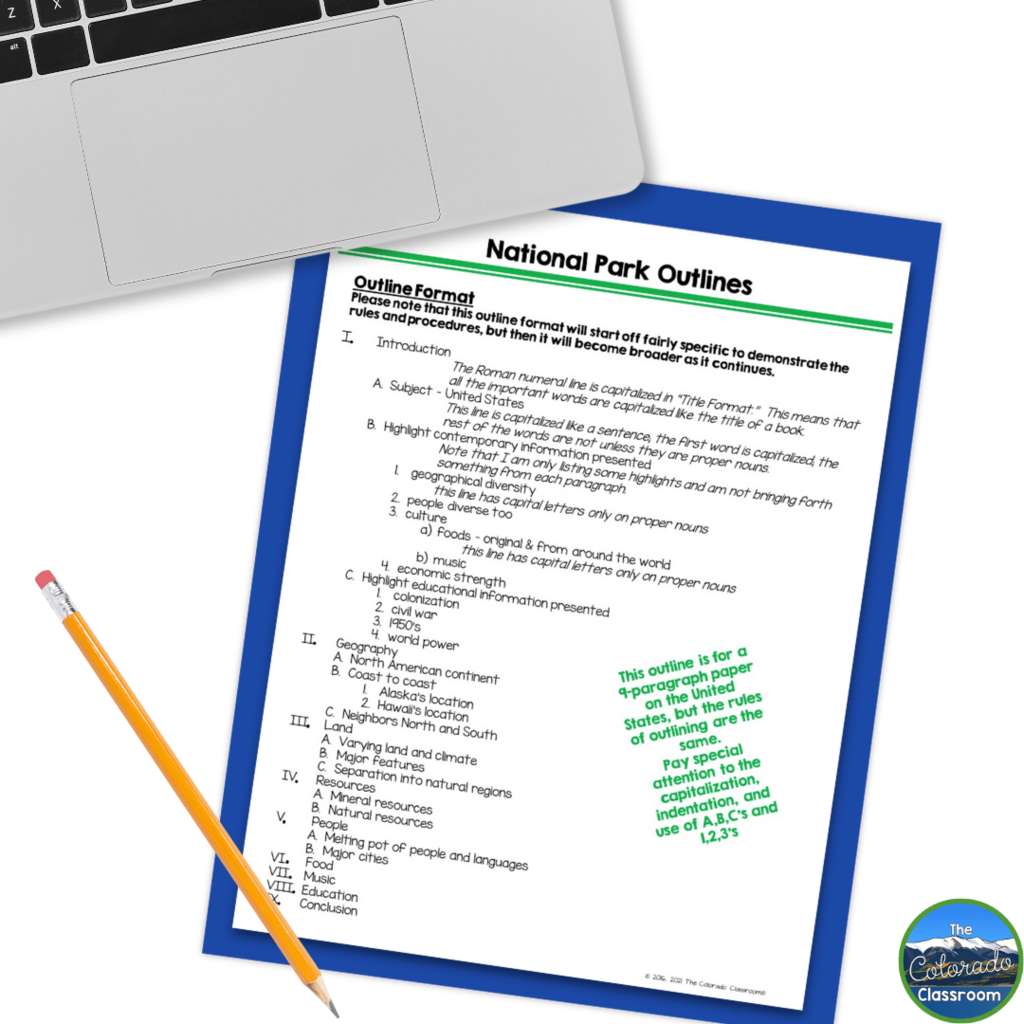
Research isn’t just about gathering information. It’s about making sense of it all. That’s where outlines come in. Armed with their note cards and bibliographies, we spent a day typing up their outline. This is where we take time to organize our note cards based on colors. I go over how to create their outline while plugging in their research. I made sure to include an example outline to help guide you when teaching this step and to have it posted in your classrooms.
I let my students go on this one once we have reviewed Roman numerals and where to capitalize A, B, C, D, etc. I do this mainly because it is the best way to be able to help them as they need it. Since each student will have a different outline, having a little one-on-one time is necessary. As students worked on grouping their note cards and organizing them in the outline, I could walk around the room and touch base with them. It was the best way I found to give the immediate feedback needed so that reviewing the outlines would not hold up the next step.
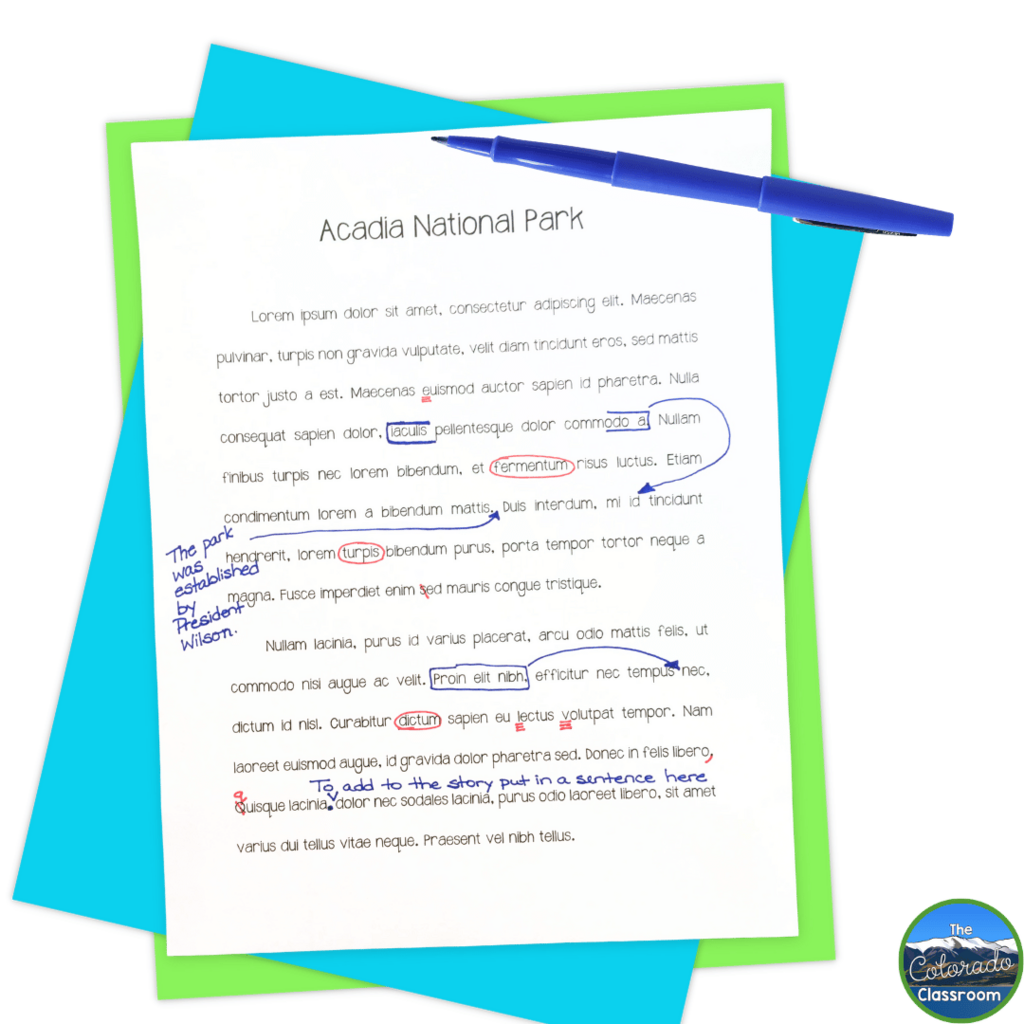
Step 6: Writing the Rough Drafts
With outlines in hand, it was time to tackle the rough draft. This stage was all about putting pen to paper (or fingers to keyboard) and fleshing out their ideas. I encouraged my students to embrace the messiness of the drafting process. It’s called a rough draft for a reason! It’s to start placing the information from our outline into sentences and paragraphs. Ideas and details are expanded on and connected.
I warned them that it would not be good to go after the first draft. They would likely read sections and realize they needed more information or that the facts they connected didn’t go well together. And. . . I reassured them that there would be edits and feedback from me to help them clean up the edges before the final draft!
Step 7: Final Steps of National Parks Research Reports
Speaking of final drafts, that brings us to the culmination of our research reports. Prepared with feedback from peers and myself, my students polished their rough drafts into a final product they were proud of! Their final drafts were complete with attention-getting introductions, well-developed body paragraphs, and strong conclusions.
Once our papers were finalized, we made the cover pages for our research reports. On our cover pages, we wrote the name of the chosen national park, the student’s name, and a visual of the national park. I even had my students’ parents sign the final cover page to show me that they saw their child’s report and helped with proofreading.
Resources for the National Parks Research Reports
Inside the National Parks Research Reports project, I’ve got you covered with step-by-step outlines that break down every part of the research process. These outlines give you the confidence to lead your students through each step as they dive into researching and writing.
I’ve even thrown in some diagrams to help visualize the color coding for the index cards. Plus, I’ve included mastery examples and rubrics for each major part of the research process so your students know exactly what to aim for as they research and organize their information into a final draft.
At the end of it all, I’ve got anchor charts ready to go. They are perfect for hanging up in your classroom as you guide, explain, and model each step of the process. My students are always referring to these, and they like to see how far they have come in the process!
Oh, and that slide show I mentioned to introduce the projects and the parks to your students is in the project packet, too. With real photographs of beautiful natural park features, this slide show will hype your kids up to get busy and get writing.
This resource truly has everything you need to start research reports in your classroom!
Kickstart Writing About the National Parks
The National Park Research Reports allow our students the chance to explore the wonders of our nation’s parks but also strengthen essential skills like research, writing, and letter writing. From diving into the research process to the satisfaction of crafting a polished final draft, our students will use these skills frequently. So, here’s to an exciting and interactive way to dive into research and writing skills while also exploring the natural wonders of our National Parks!
Save for Later
Remember to save this post to your favorite teacher Pinterest board when you are teaching writing skills through research reports!